
If you’re here, chances are you’re either obsessed with your pet, secretly proud of your brush skills (or hope to develop some), or you’ve stared at your blank wall thinking, “You know what this needs? A giant painting of Pickles the pug.”
Painting your pet isn’t just an artistic venture—it’s deeply personal. It’s an act of attention, of celebrating the funny way their tail curves when they’re happy, or the grumpy line their whiskers make when they’re judging your snack choices.
In a world where everything is fast and digital, this kind of slow, observational art helps you reconnect—with them, with yourself, and with the joy of creating something by hand.
Besides, it’s one of those rare projects where you end up laughing, crying, and sometimes both—especially if your first attempt at painting their snout ends up looking like a melted potato. No judgment here. That just means you’re in it for the love.
And if you want help with reference editing, outline filters, or inspiration, head over to DIY pet portraits on Furmino. They’ve got resources for beginners, plus kits that make the process even more accessible. It’s like having a creative buddy in your corner.
Choosing the Right Style: Matching Their Energy, Not Just Their Face
Before you touch a pencil or paint, pause and think about this: Who is your pet, really?
Are they a playful goofball, chasing imaginary birds across the living room rug? Or maybe they’re the soulful type, lounging like feline royalty and making you feel like the butler? The style of your painting should reflect that.
You’ve got options—and each has its own charm:
- Realistic: Perfect for older pets or sentimental portraits, especially if you’re aiming to preserve every fur strand like a photographic memory. Think detailed eyes, natural colors, and soft blending.
- Cartoon or Stylized: Ideal if your pet has a larger-than-life personality. Use big expressions, exaggerated features, bold outlines, and playful backgrounds.
- Pop Art: Go full Warhol. High-contrast, flat colors, maybe even repeat patterns. Great for modern interiors and attention-grabbing pieces.
- Minimalist: Focus on one striking feature—like their iconic floppy ears or the spiral tail—and keep the rest clean and bold.
- Impressionist or Abstract: If you want to capture the feeling more than the form, go for texture, color, and energy instead of perfection.
It’s okay to experiment here. What matters is that the final result feels like them, even if it doesn’t look exactly like a photo.
Materials Matter (But You Don’t Need a Fancy Studio)
When we talk about setup, you don’t need a Parisian atelier with perfect lighting and ten kinds of easels. A kitchen table, some good lighting, and the right materials are more than enough. Here’s what you’ll need:
Core Supplies:
- Canvas or sturdy paper: Canvas boards are beginner-friendly and affordable. Watercolor paper or mixed media paper also works if you’re going the paint-pencil route.
- Paints:
- Acrylic: Fast-drying, vibrant, great for beginners.
- Watercolor: Softer, more delicate, excellent for a dreamy or whimsical style.
- Gouache: Matte finish, opaque like acrylic but reworkable like watercolor—best of both worlds.
- Brushes: Start with three: one flat, one medium round, one fine detail.
- Pencil: For light sketching.
- Palette and water cup: A ceramic plate works in a pinch.
- Paper towels or rag: For dabs, smudges, and minor disasters.
- Reference photo: More on this next.
Set the mood: put on calming music, keep snacks nearby, and maybe keep your pet out of reach if they’re the type to swat at paint water.
The Reference Photo: The Soul of Your Pet Painting

Your painting is only as good as the reference photo—and no, that blurry 2 AM shot of your cat mid-yawn won’t cut it (unless you’re going for surrealism).
You need something with:
- Good lighting: Natural light is key. Avoid shadows across their face.
- Sharp details: So you can see eye reflections, nose texture, fur direction.
- Expression: The look that makes them them. Whether it’s soft, chaotic, or stoic—capture that.
Once you have your ideal shot, print it out or keep it on a screen. Bonus: take a few and compare.
Sometimes the best one isn’t the one where they look cute, but the one where their personality radiates through their eyes.
Sketch Time: Start Loose, Then Shape the Soul
Now it’s time to sketch, but don’t tighten up just yet. Begin with broad strokes—basic head shape, neck, body posture. Use light pressure so it’s easy to erase or adjust.
Once the frame’s down, focus on landmark features:
- Eye placement and shape (most expressive part)
- Nose and snout angles
- Ears—floppy, upright, tilted?
- Collar, scarf, or accessories
You’re not trying to make it perfect here. You’re building a map for your brush to follow later. Think of it as scaffolding—it’s meant to be covered eventually.
Painting Process: From Chaos to Character
Layer 1: Base Tones
Lay down large areas of color. Start with:
- Background wash (plain, gradient, or abstract splashes)
- Fur base in mid-tones
- Nose, eyes, ears in muted versions of final color
Don’t get caught in the detail weeds yet—this is just to claim the canvas.
Layer 2: Shadows and Highlights
Start shaping the form. Add darker tones under the jaw, behind ears, beneath the body. Then build highlights: nose glint, fur sheen, eye sparkle.
Layer slowly. Let things dry in between. Acrylic loves layering—watercolors reward patience.
Layer 3: Textures and Features
Use a smaller brush now. Start adding:
- Fur strokes in multiple directions
- Eye reflections and lashes
- Nose dots and leather texture
- Whiskers (white or gray paint on fine brush)
This is the stage where the personality shows up. Don’t rush. Trust the process—even if it looks a little off, it often clicks together in the last 20%.
Posing Their Personality (Optional but Powerful)
If you’re feeling bold or dramatic, set the scene. Paint them in a scenario that says something:
- Laid-back lapdog: On a cushy pillow, paws tucked, eyes half-closed
- Adventure cat: Perched on a windowsill, looking like it’s plotting a takeover
- Zoomie king: Mid-leap in a backyard, ears and tongue flying
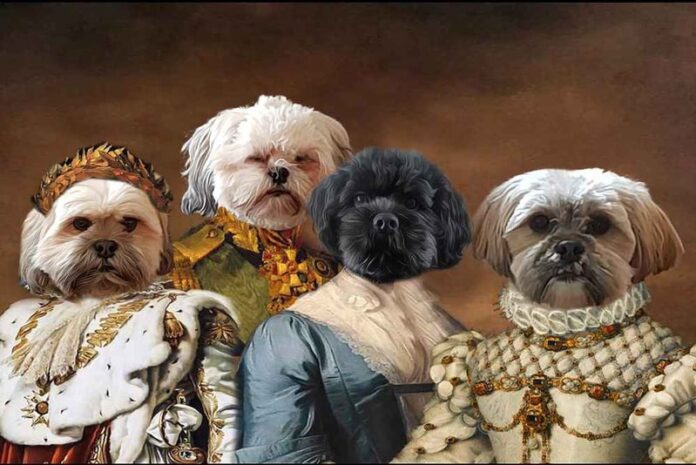
- Regal fluffball: Sitting tall against velvet drapes, maybe even with a painted-on crown
These added elements make it less of a portrait and more of a story.
Why It’s Worth It
This project isn’t just about getting a cute picture of your pet. It’s about the way you’ll remember them when you’re layering brush strokes. It’s the quiet focus of capturing their gaze. The laugh when your first draft looks like a raccoon with a cold. The moment you realize—you didn’t just make art, you made love visible.
And that’s something no machine, no app, no store-bought print can replicate.
So go on—grab the brushes. Your pet’s story deserves to be painted.


