
Maintaining your kitchen is a must if you want to keep yourself and everyone around you safe; if you want to prevent pests and insects, and if you want to keep everyone healthy.
The grease separator is the device that basically does all those things, and it is the best way to prevent stench, diseases, and fire hazards. If we want this unit to function properly, we need to maintain it regularly. Keep on reading if you want to learn how to clean a residential grease trap in a few easy steps.
-
Get the tools and things you need
Before you start doing anything else, you need to gather all the tools and equipment that you will need to get the job done. First, you will need a screwdriver and a pry bar, and you will also need a scoop that you can use to take all the grease out. Have a lot of heavy-duty garbage bags with you, and preferably a trash can. Don’t forget to get some old rags or clothes that you can use to fully clean and dry the unit.
In addition to this, you will need protective gear as well, and this includes a face mask and gloves. If you want to be fully protected, you can get some goggles and an apron as well.
-
Start by removing the lid
To properly clean this device, you need to start by removing the lid from the interceptor. This can be done in several ways, depending on the unit that you have. Most often, it should be secured with screws, so you should use a screwdriver to take them out.
Note that depending on how often you maintain it, the lid may be stuck. You can use a pry bar or a lever to easily pop it out. Make sure you don’t use too much force so you don’t end up damaging the unit.
-
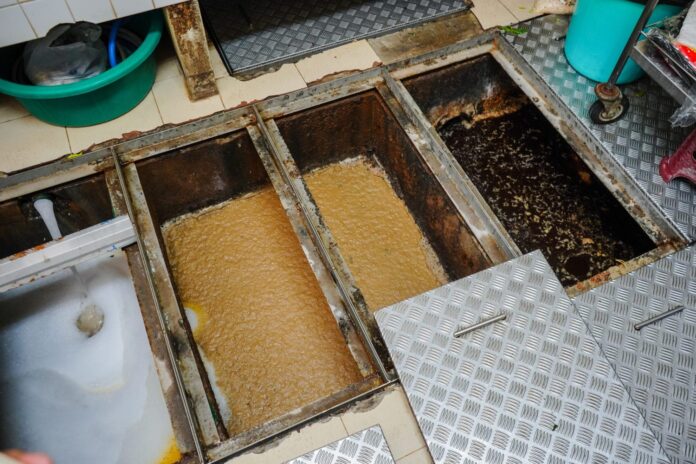
Remove any obstacles and large things from the interceptor
After you have removed the lid now you will be able to see the condition of the unit, and you will be able to see how full it is and if there are any large objects inside it. In some cases, there may be large clumps of grease that are already dried out that you can just remove. At other times, you may notice other types of debris that could be the reason why your trap is clogged. Carefully remove them using protective equipment, and make sure you take out any large objects before you start cleaning the unit.
-
Remove the grease
Once you’ve taken out all the large obstacles, the next part is removing the actual grease from the device. Note that this is not going to be an easy job or a pleasant task, and you may even feel sick of the unpleasant stench that comes out of the separator, epically if it hasn’t been cleaned for a long time.
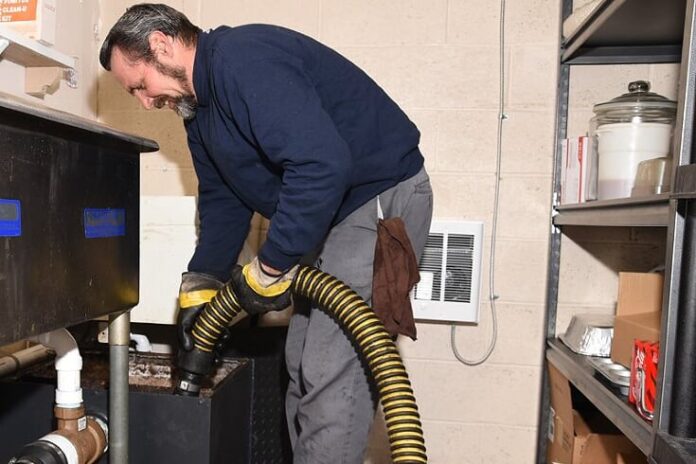
On websites like greasetrapchicago.com, you can see that you don’t have to do it all on your own and that a reliable, professional service can help you get this done without any problems or delays.
If you choose to do it on your own, you will need to carefully scoop all the grease out from the separator. You have to be patient about this step, and you should not rush it. Allow everything to drain slowly while removing the hardened parts by hand. Remember that you need to have a bin where you can take all the hard parts and you also need to seize any liquids.
-
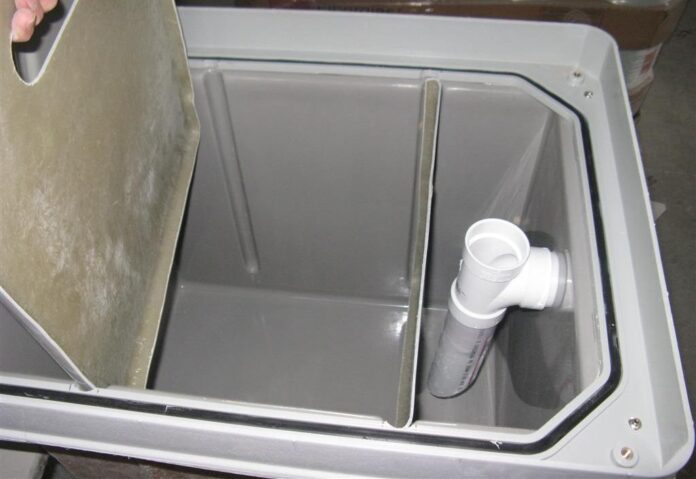
Clean and wash the unit
When you get to this step, you should know that you are done with the most difficult part. By now, all the fat should be removed from the device, and you may be able to notice just a few parts of it here and there. Many people believe that you don’t need to do anything else, but it is far better to get the job fully completed than to leave some things out for the next time.
You can wash the rest of it by using a garden hose or anything that you see fit that would use water pressure to get rid of all the residue left. If needed, you should scoop out and remove any grease that might pop up during this part of the cleaning. You don’t need to use any soap or detergent to clean the rest, but if you want to make it sparkling clean, you can use some soap, and a cloth to deeply clean even the smallest parts left. You can also use warm water to easily break any fat residue. Note that if you choose to do this, it will take some additional time.
-
Put the lid back on
Finally, after everything is properly cleaned, you will need to wipe any of the excess moisture, or you can leave it to air dry. Double-check to see if there is any fat residue left, and make sure that you have washed the interceptor from any leftover detergent if you chose to use one.
In case there were any screws on the lid, you will need to check and see if the space around them is completely dry. Then just put the lid back on, and see if you need to pop or screw it in. once again, do not use too much force and not tighten the screws too much. You will need to do this all over again in some time, so you don’t want to risk making your job even more difficult. Be patient, and know that if you use too much force you may end up damaging the unit.
That’s it! You can finish this task in just six steps, and once you get ahold of the process, you will start doing it faster and faster. Nevertheless, it is always better to collaborate with professionals and get this thing done by a good service than to risk wasting time and doing damages on your own. Don’t forget to check out additional tutorials depending on the exact type of residential separator that you own.


